Unlocking Creative Potential with Pattern Brushes for Procreate
Digital illustration has evolved from a niche hobby into a robust professional industry, and at the heart of this transformation is the iPad paired with powerful software like Procreate. For artists, designers, and small business owners, efficiency is just as critical as creativity. This is where Pattern Brushes for Procreate become an indispensable tool. Unlike standard brushes that paint a single stroke, pattern brushes repeat a motif along your path, allowing you to create intricate borders, seamless backgrounds, and textured fills in seconds rather than hours. However, simply downloading a brush pack is not enough to guarantee professional results. Many creators stumble over common pitfalls regarding scale, color management, and application, leading to frustrated workflows and subpar designs.
The Misconception of "Plug-and-Play" Simplicity
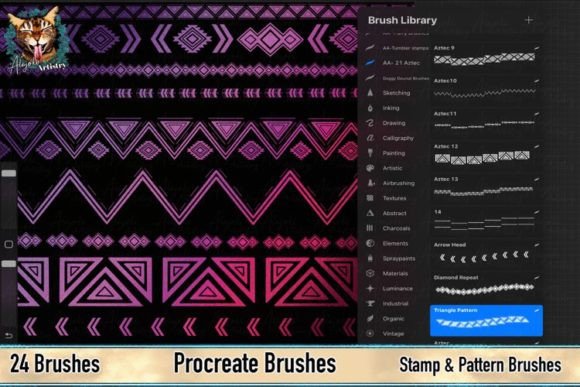
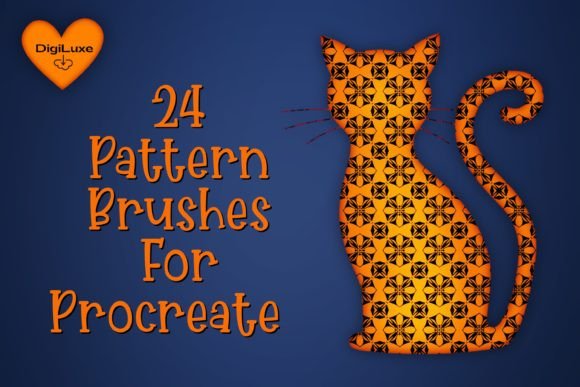
A frequent misunderstanding among beginners is the belief that pattern brushes are static, one-size-fits-all assets. You might download a set of 24 Unique Pattern Brushes for Procreate, select one, and draw a line, only to find the elements are comically large or microscopically small. This disconnect often leads users to abandon the tool, thinking it is flawed. In reality, the power of these brushes lies in their adjustability. A high-quality brush set is designed to be dynamic. The mistake here is failing to utilize the built-in controls for scaling. When you ignore the ability to adjust the size of the repeating element, you limit the brush to a single use case. A floral border that looks perfect on a digital sticker sheet may look clumsy and oversized on a business card if the scale is not corrected.
To avoid this, always check for an included instruction card or guide within your download. Most professional brush makers include a quick reference on how to adjust the scale using Procreate’s brush settings or specific gesture controls. By mastering this adjustment, you transform a single brush into a versatile tool capable of handling everything from delicate jewelry design mock-ups to bold poster headers.
Overlooking Recolorability and Versatility
Another critical error is purchasing or using pattern brushes that are not fully recolorable. Some lower-quality brushes rely on complex layer effects or fixed textures that resist color changes. This severely limits their utility. If you cannot easily change a blue geometric pattern to match a client’s brand colors, the brush becomes a novelty rather than a workhorse. The ideal set should allow for infinite applications through simple color adjustments. When evaluating a new pack, test the brush on a new layer with a different foreground color. If the pattern does not adapt cleanly, it may require excessive post-processing, defeating the purpose of using a time-saving tool.
Consider the practical implications for entrepreneurs and marketers. You might need to create cohesive branding across various materials, such as brochures, stationary, and gift bags. Using non-recolorable brushes forces you to create separate files for each color variation, bloating your storage and complicating your workflow. Conversely, a fully recolorable brush allows you to maintain a consistent aesthetic while adapting to different campaigns instantly. This flexibility is what separates amateur doodles from professional-grade design assets.
Ignoring Context and Application
Even with the right tools, many creators fail to consider the context of their design. A common mistake is overusing pattern brushes, resulting in visual clutter. Just because you can fill every empty space with a decorative border does not mean you should. Effective design relies on balance and white space. For instance, when designing tags or cards, a subtle pattern can add interest without overwhelming the text. However, applying a heavy, high-contrast pattern behind readable content can make the information inaccessible.
Think about the end user. If you are creating mock-ups for clients, the pattern should enhance the product, not distract from it. Use these brushes to frame key elements or to add texture to background layers. For educators creating worksheets, light, repetitive patterns can make the page feel inviting without causing cognitive overload for students. The key is intentionality. Ask yourself: Does this pattern serve a purpose? Is it guiding the eye or adding necessary texture? If the answer is no, simplify your approach.
Neglecting Technical Quality and Resolution
When downloading free or low-cost brushes, users often overlook technical specifications. A pattern brush that looks crisp on a small screen may pixelate when printed on a flyer or large-format poster. This happens when the source images used to create the brush are low resolution. Before committing to a project, test your brush at the final output size. Zoom in closely. If the edges appear jagged or blurry, the brush is not suitable for print media. This oversight can lead to costly reprints or disappointed clients.
Professional-grade sets, such as those offering 24 unique options, typically ensure high-resolution source files. However, it is still wise to verify this before starting a major project. Check the creator’s description for mentions of DPI or print readiness. If this information is missing, proceed with caution. It is better to spend a few minutes testing than to discover the flaw after hours of detailed work.
Best Practices for Integration
To get the most out of your digital toolkit, integrate pattern brushes into a structured workflow. Start by organizing your library. Group your brushes by style—geometric, organic, floral, abstract—so you can find the right tool quickly. When beginning a new project, such as designing stationary or social media graphics, sketch your layout first. Identify areas where texture or repetition would add value. Then, select your brush and adjust the scale to fit the space harmoniously.
- Test Scale Early: Adjust the brush size before drawing long strokes to ensure the proportion fits your canvas.
- Layer Management: Keep pattern brushes on separate layers. This allows you to adjust opacity, blending modes, or color without affecting the underlying illustration.
- Combine Tools: Use pattern brushes alongside standard brushes. A hand-drawn sketch paired with a clean, digital pattern border creates a compelling contrast between organic and structured elements.
By avoiding these common mistakes and adopting a mindful approach, you can elevate your digital art. Pattern brushes are not just shortcuts; they are creative partners that, when used correctly, expand your artistic vocabulary. Whether you are a freelancer looking to speed up client deliverables or a hobbyist wanting to add polish to personal projects, understanding the nuances of scale, color, and context will ensure your work stands out. Invest time in learning the specifics of your tools, and you will find that these 24 unique brushes offer endless possibilities for innovation and expression.